If you're new to ChromeOS or haven't had a need to print from a Chromebook yet, don't worry -- it's easy. Google designed Chromebooks to simplify computing while keeping these low-cost devices powerful and versatile enough for most daily needs.
Generally speaking, the process is about the same as it is with any other computer. If you have any trouble, it's also possible to fall back on the Android subsystem built into modern Chromebooks. Android enjoys better support from printer manufacturers than ChromeOS.
Connecting a printer to your Chromebook is pretty straightforward via Settings, but ChromeOS has a different layout than Windows and macOS. Here’s how you can set up a wired or wireless printer to print from your Chromebook.
If you don't have a printer yet or are considering a new model, you should check out our guide to the best Chromebook-compatible printers you can buy. That will make everything a little bit easier.
Set up your printer with Wi-Fi
If you don’t already have your printer on your wireless network, you can likely use the embedded touch display or a smartphone app to walk yourself through the setup wizard. Otherwise, you’ll need the manual, which you can download from the manufacturer’s website.
If you don’t have the option to use wireless printing, skip to the next section. Otherwise, start by turning the printer on and making sure that it’s functioning correctly and connected to the wireless network.
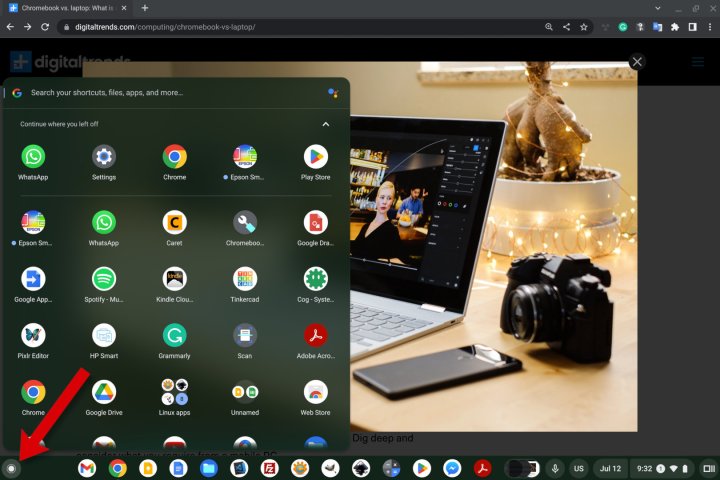
Step 1: Open the Launcher by selecting the round button at the bottom left.
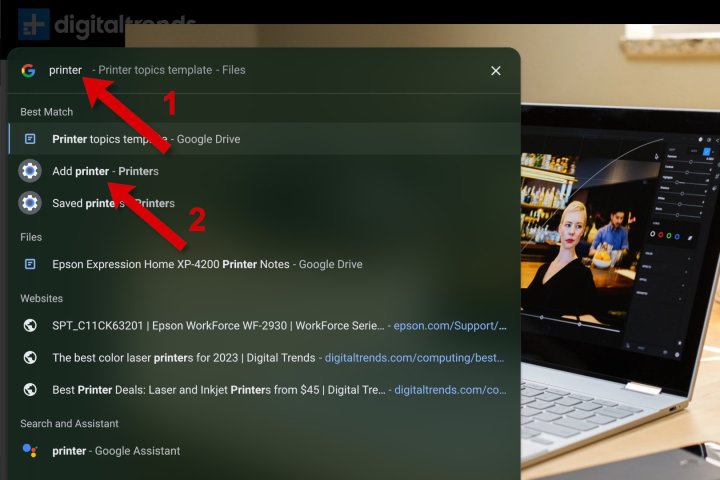
Step 2: Start typing "printer" in the search box at the top of the launcher, then select Add printer from the Best Match list below.
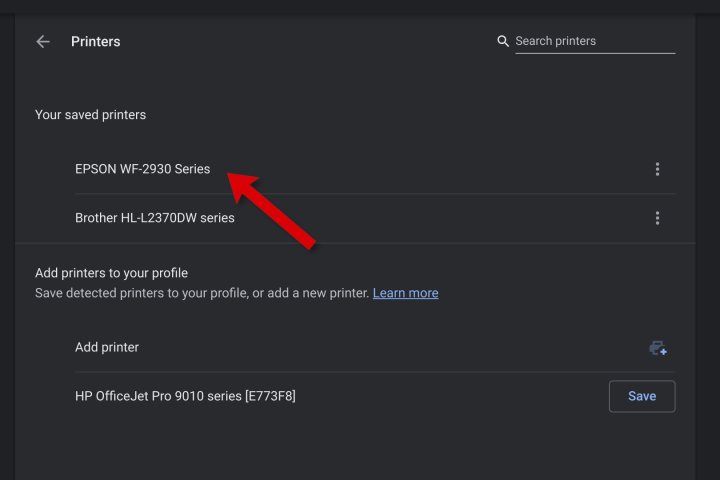
Step 3: If you've already added printers, they will be shown in a list of saved printers. Just below, you'll see printers you can Save or Set Up.
You might notice the HP OfficeJet Pro 9015e (shown as the 9010 series) in the list, and it works well with a Chromebook. The Epson WorkForce WF-2930 is also a good option.
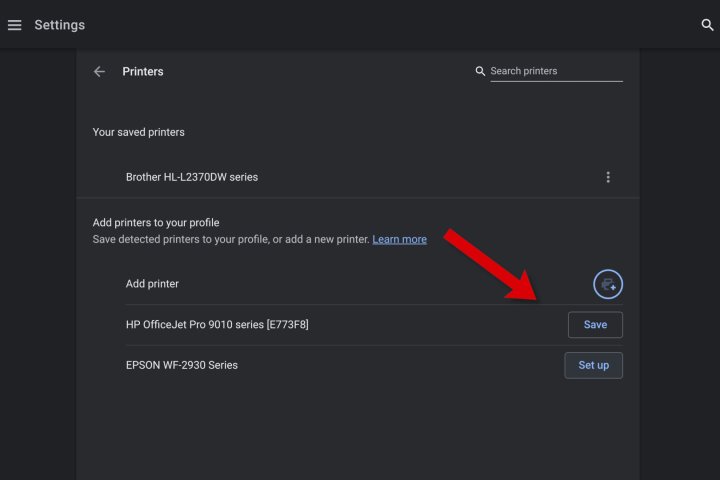
Step 4: Select Save or Set up to add those printers to your saved list so they'll appear as an option when you need to print a photo or document.
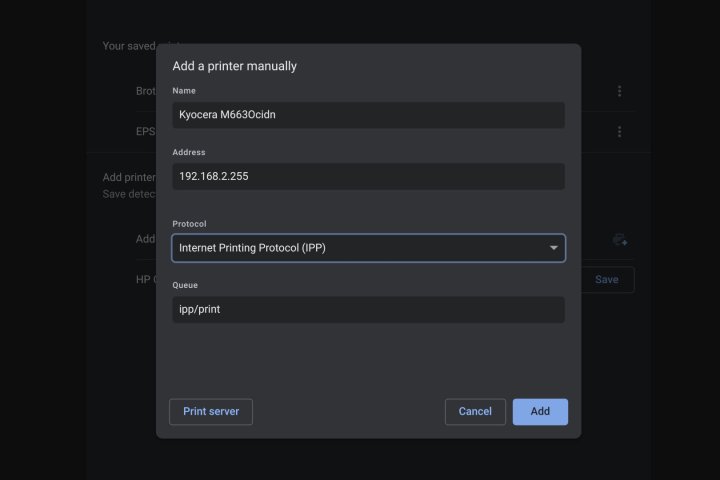
Step 5: If your printer doesn’t automatically appear, click the blue Plus icon to the right of Add Printer. A pop-up window appears for you to enter a name, the printer’s IP address, the protocol (typically IPP), and the queue (typically ipp/print).
The printer manufacturer's website should be able to tell you which protocol to use and how to find your printer's IP address.
Set up your printer with a USB cable
If your printer is older and doesn’t support Wi-Fi connections, you can set up your printer using a USB cable. However, this method may not work on older printers because you can’t install software or drivers on a Chromebook.
It's generally much easier to use Wi-Fi. Even though many modern printers support USB connections, the required cable is rarely included.
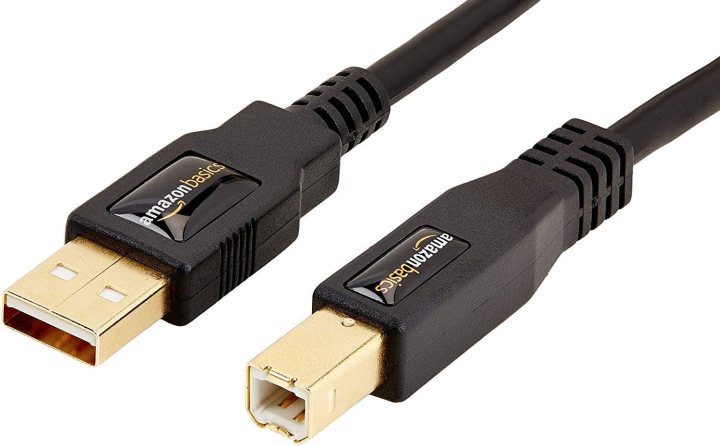
Step 1: Connect your printer’s USB cable to the appropriate port on the Chromebook. You may need a USB-A to USB-C adapter, depending on the Chromebook model. Also, verify that the printer is on and functioning normally.
Step 2: Once plugged in, a notification will appear, providing further instructions.
How to print on a Chromebook
Now that your printer is all set up, you are ready to print from your Chromebook.
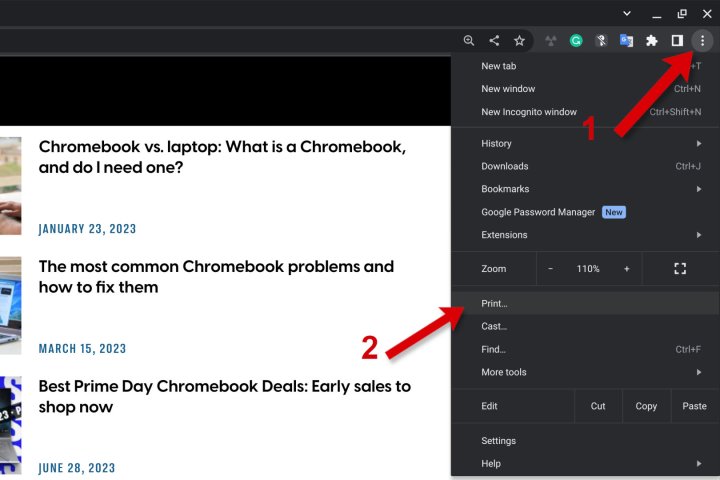
Step 1: Open the page or photo you need to print and press the Ctrl + P keys simultaneously. Alternatively, you can select the three vertical dots at the top-right corner and select Print from the drop-down menu.
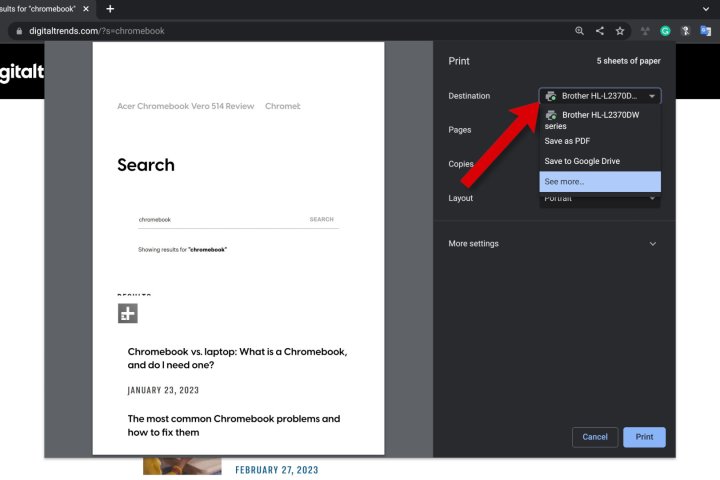
Step 2: A pop-up window will show printing options. If you don't see the printer you want beside Destination, select the down arrow and choose the printer you prefer.
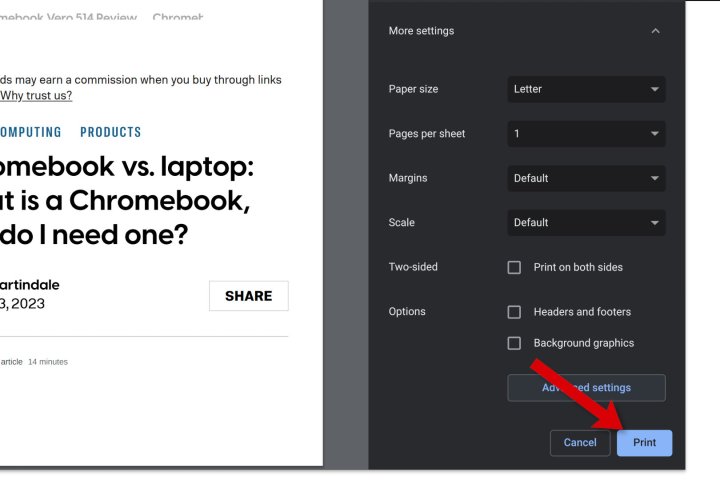
Step 3: Select More settings to see additional options.
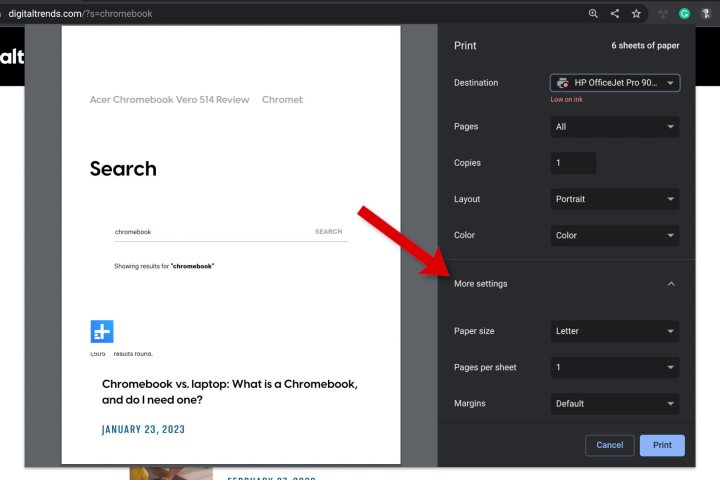
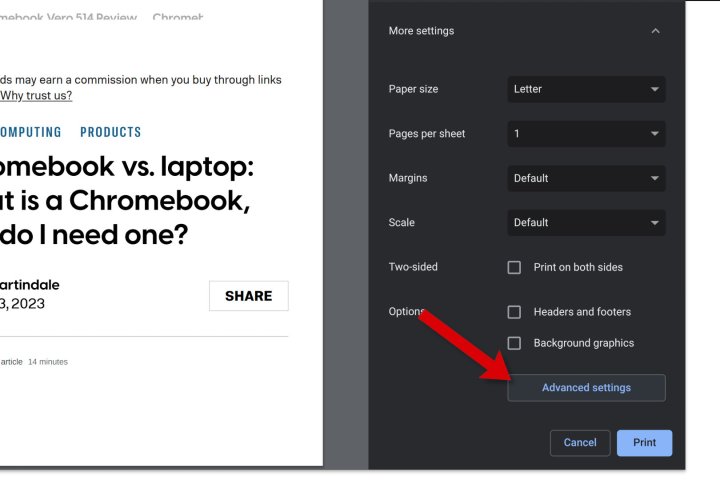
Step 4: Scroll down to see all of the controls. Select Advanced settings for even more options.
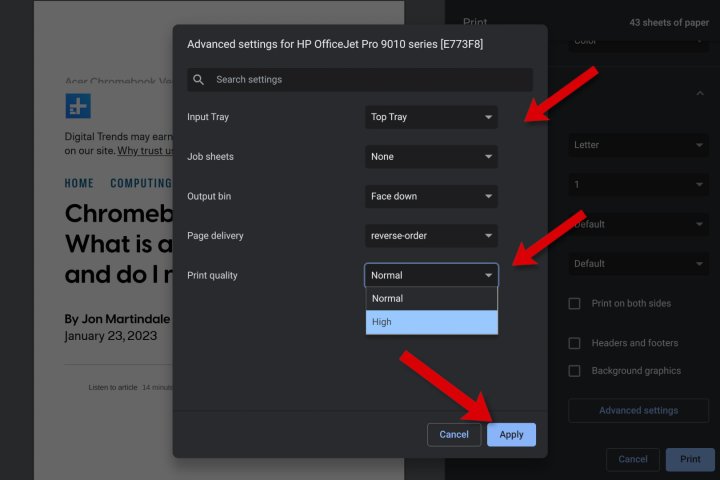
Step 5: A new window opens where you can choose input and output trays, your preferred Print quality, and more. Select Apply to get back to the print window.
Step 6: When everything is set the way you want, select the Print button to start printing.
Scan with your all-in-one printer
A Chromebook can also connect to a scanner or all-in-one printer that includes a scanner.
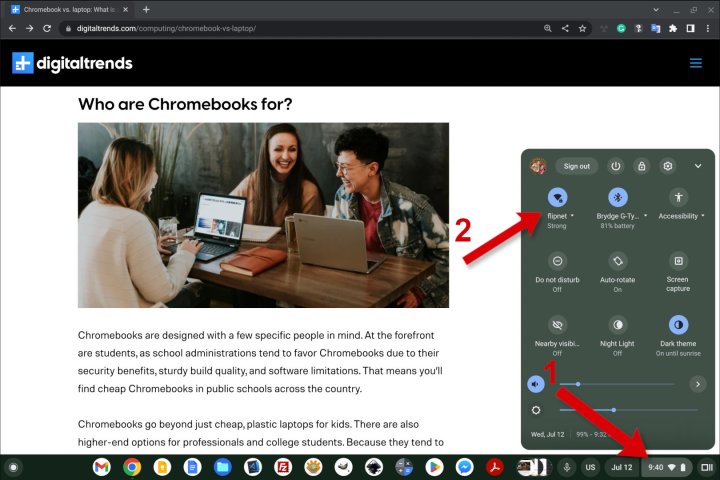
Step 1: Select the system clock located in the bottom-right corner and make sure your Chromebook is connected to the same network as the printer.
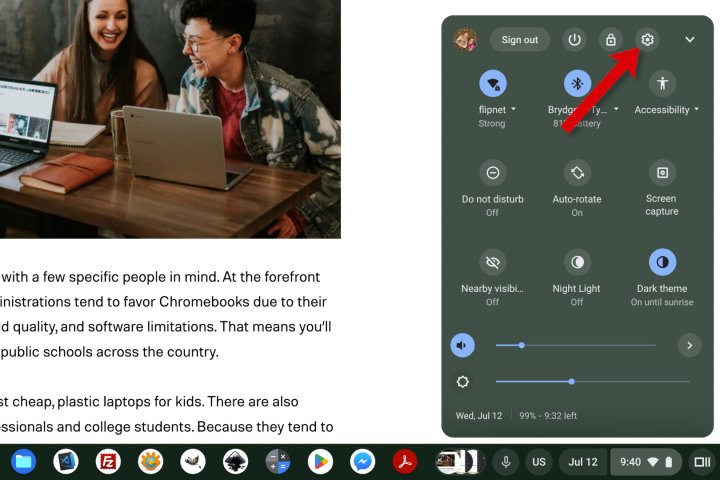
Step 2: With the pop-up menu still active, click the gear icon.
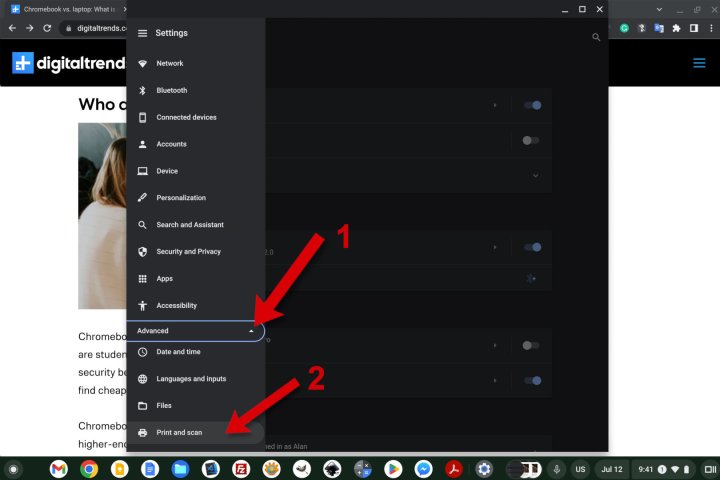
Step 3: The Settings window will appear. Open the left sidebar by selecting the three lines at the top left.
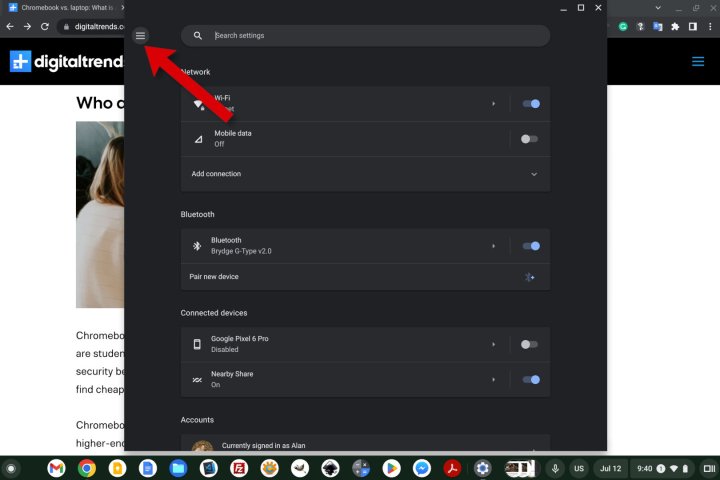
Step 4: Select the down arrow next to Advanced to expand the menu., then choose Print and scan to open printer settings.
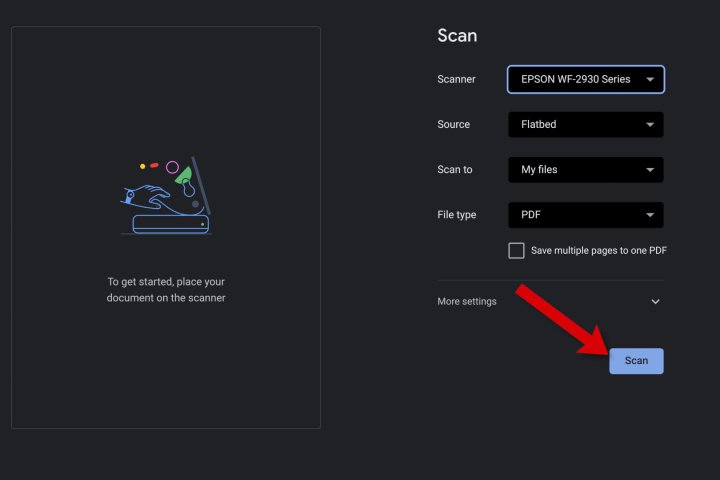
Step 5: Select the Scan option to open a window with controls for scanning.

Step 6: The Scan window will let you choose your scanner or all-in-one printer and other details. When you're ready, select the Scan button.
Print with an Android app
If you have any trouble accessing your printer or some features aren't available via ChromeOS, you can easily install the printer manufacturer's Android app. Then you can access all of the same capabilities you can from your smartphone.
Step 1: Choose the Launcher in the bottom-left corner of the screen to open a search. Begin typing "Play Store" and select the app when you see it.

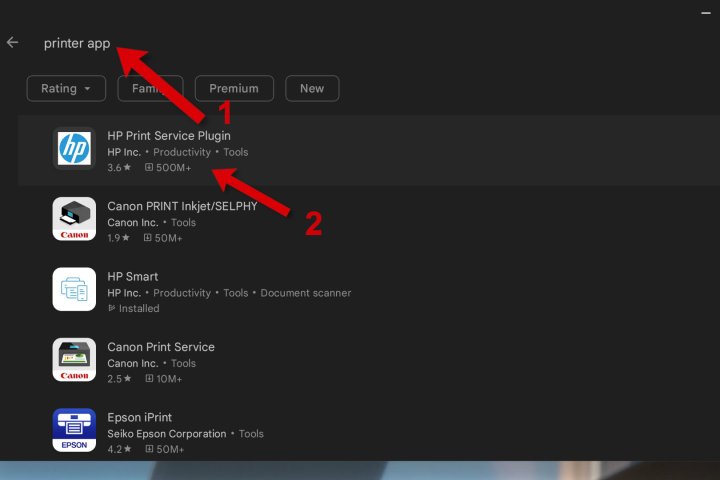
Step 2: In the Play Store, type the manufacturer of your printer or simply "printer app" and browse the list to find the correct app. HP, Epson, Canon, Brother, and more will be available.
Step 3: After installing the correct app for your printer, open it and follow the manufacturer's instructions to connect and begin printing.

Once you know how to print from a Chromebook and access special features of your printer from an Android app running on ChromeOS, you might be able to rethink whether you still need a Windows PC or a Mac. The best Chromebooks are proper computers now, but remain less expensive and easier to maintain. Add a printer and suddenly, you can take care of all sorts of office and school work even when your budget is tight.
Editors' Recommendations
- How to use a blue light filter on your PC or Mac
- How to set up multiple monitors for PC gaming
- The best 2-in-1 laptops in 2023
- Chromebook vs laptop: Which is better and what is the difference?
- How to download music from YouTube